Tuesday, August 28, 2007

A View of A Room

I was only going to change the dining room tablecloth, I swear! That was all. Four hours later, we had completely re-arranged three different rooms. We were so pleased with the effect, we thought we’d share.

You might think, "They have a table in the middle of the room….WHY, for heaven’s sake?" In all the pictures that we could find of interior decorating around the turn of the last century, it was very typical to have a table such as this one (from the 1860’s, I might add) in the middle of the room. Don’t ask us why, they just did. Of course, it’ll stay there till one of us forgets that it’s there and crashes into it in the dark. Until then, we’ll enjoy our little touch of authenticity. Hope you do too.

Thursday, August 23, 2007

Restoration of A Different Kind

I remember the days when the mere utterance of the word "abstract," as it pertains to real estate, was followed by a sharp intake of air and a feeling of solemnity and reverence, as if someone had said "Allah," or "Yahweh," or "Carter’s Little Liver Pills." I grew tired of merely speculating about the history of the two houses that we own in one of the oldest parts of town. I wanted the facts! However, I ran into a brick wall on my first attempt. The office of Registrar of Deeds informed me that abstracts were no longer kept on houses – and hadn’t been for many years! What was once held in scriptural regard has now vaporized with obsolescence. No one even knows where they all went!

My thinking is, if we’re going to put all of this work into these houses, then they deserve to have a fleshed-out pedigree. At least, as much as possible. I had researched all the occupants of our other house, years ago. That effort yielded quite an extensive list of names – 44 in total. My source for this information was the Polk’s City Directory, and that’s where I was to return to uncover the linage of our current home.

The first time our address appears in the directory was in 1911. It can logically be assumed, then, that the house was built in 1910. This confirms what we were told by the realtor when we bought the house. What was interesting was just how long the original owners lived here. It was a married couple with two children. The husband was 12 years older than his wife, and he would live in the house until his death in 1941 (at the age of 82). She would remain in the house four more years, moving and dying, later, in 1948 (age 76).

After her death, the house changed hands rapidly, for quite a number of years. One of the original mysteries (and delights) about the house was that all the woodwork and hardware was kept in tact – never painted or altered in any way. Even the walls didn’t appear to have been painted! It was hard to believe that decades of ownership would result in such unimaginative inhabitants, to have never even made the effort to paint! We concluded that one of the children of the original owners retained the house as a rental. Because of that status, many of the fine old features unique to a house like that was preserved and maintained. There were probably strict rules about the care of the house and many strict parameters regarding decorating, etc.

In 1956, the house was listed as being "vacant." In 1957, the upstairs apartment makes its first appearance (via a "1/2" designation following the house address). My theory – and this is only a theory, right now – is that the son of the original owners was, at this time, in his early sixties. He could have been thinking about padding his retirement income by splitting the old homestead into two rental incomes.

Our appetites for discovery were whetted even more, last week, upon attending a meeting of the local genealogical society. There, we were both captivated by a fascinating talk given by a woman who works for the city’s historic building preservation office (we didn’t even know they had one!). She explained that her office still had information regarding building permits issued over the years. I later emailed her office with inquires about both of our houses, hoping that she had something on file that would give us some good leads. She only had building permits for garage additions, that were done much later, and some remodel work. No permits exist for the construction of the houses. She did inform us that there is a way to make your own abstract; and now, with this bevy of names on hand, we’re well on our way. The county holds documents that will add a few branches to our house’s family tree, so that’s our next stop.

Stay tuned!

Inner Beauty


One of the favorite features of our old home is a built-in china hutch that occupies a prominent space between the dining room and kitchen. I had started stripping the hutch last January in a "fit of good intentions," as one writer put it, thinking I could knock it off in no time at all. I only got as far as the two bottom shelves when other matters – namely, kitchen, bathroom and floors – distracted me. Brother Rob extricated several doors, when we were gone one day. He returned them a few days later so nice and clean, you could practically have eaten off of them.


For months, the hutch sat forlorn, half-naked and partially disassembled. The old finish that did not get scraped off when I last applied stripper dripped down and hardened on the bare wood below. The thick, black gunk lay in frozen rivulets across the front of the cabinetry like tear-streaked mascara. The belle of the dining room stood weeping, her shelves that once held heirloom china now a convenient repository for hammers, screwdrivers, prybars, drywall screws, duct tape, a paper plate with doorknobs and screws, caulking, paint brushes, steel wool, cat toys, weeks-old newspaper, Target shopping bags . . .

At the commencement of OPERATION FACE LIFT, I turned off the central air, opened the dining room windows, strategically positioned fans to move air both on and away from the work site, rolled up my sleeves and began. I decided to switch to a stripper that is supposedly safe for indoor use. This is not a choice I would normally have made, but I didn’t want our cat to go bonkers from the fumes, and I especially didn’t want the house to stink from now until Christmas!

I slathered on the harmless looking goo with enthusiasm, if not optimism. I was unsure that something so innocuous looking and smelling could remove anything more substantive than Easter egg coloring. The directions clearly stated that it could take up to 30 minutes to show some results, and that ended up being pretty close to the truth. Nevertheless, after about a half-hour, the old finish started swimming and mixing with the peach-colored stripper.

It took a couple of applications of stripper, as some of the varnish had crystallized, like sugar baked on a cake pan. With diligence, what was left of the nasty, old finish was finally gone; and, like a receding wave along the shore, it revealed "artifacts" of wear: An errant hammer strike from a carpenter that originally installed it, a scratch from a furniture move, a gouge or two at the bottom from hard-toed shoes or children vigorously playing with their toys on the dining room floor. But old wood is an amazingly forgiving thing. No matter how brutally it gets treated over a period of time, it only asks of us a little elbow grease to coax it back to its original state.

After I removed as much of the old finish as possible, I went back over the surface with that marvelous wash I discovered -- thankfully – early on ("CitriStrip"). This stuff takes it down all the way to the surface of the bare wood. The grain runs clear throughout the boards, each line a sentence from stories of old-growth trees.

I set aside the next day for staining. The first coat, as I anticipated, went on unevenly. It is the second coat that brings everything together. The irreparable blemishes quietly fade into the background, and the dramatic swirls of grain take center stage.

After two coats of polyurethane – this process taking at least two days to complete – it was time to put back together again. Making cabinetry is an art. Putting cabinetry back together is a science! It took the better part of a day; nevertheless, all the doors and hardware finally got put back in place.

In the space between the floor and the bottom shelf, I slipped a note explaining who did what and when to the hutch, just before sealing it up with the board that runs along the front. Now we have a pretty built-in china hutch along with a bit of immortality as well!

Monday, July 23, 2007

Dummies?

The police department in our town recently started a new program. (Wait, this really does have something to do with houseblogs. Keep reading.) They park a squad car off to the side of a notoriously busy highway in town and plant, get this, a policewoman dummy behind the wheel. (This ruse is a warning. There’s a real police officer down the road ready to catch those speeders who didn’t get the message the first time.) As unimaginative as it sounds, this mannequin’s moniker is "Dolly."

Traveling past the spot where we usually see Dolly on the job, my mother-in-law noticed that she wasn’t there.

"I wonder where she’s gone," she asked.

"Hmm.. She’s probably been on the force long enough to earn some vacation time," I suggested. "I wonder where dummies go for vacation?"

"They buy houses and spend their entire summer break getting their other house ready to rent," she quipped.

(See, I got around to housework after all.)

She’s right. That’s what it’s been like for us. A non-stop marathon of Restore, Renew, Repair, Request, Re-think, Resume, Re…. You get the point. Initially, when we bought our Homestead/Pre-Bungalow house with latent Victorian Tendencies, we planned to sell our other house. Did I mention the houses were directly across the street from each other? After we made the move, and had been living in our new, old home for a few weeks, it became increasingly obvious to us that giving up the other house and surrendering it to the whims and possibly destructive tendencies of new owners would be too much to observe on a daily basis. Every time we stepped out on the porch or checked the sunset from the upstairs windows, our old house would be front and center in our view. There would be no way not to notice.

Therefore, we decided to hang on to it and make it a rental (besides, the title "landLORD" had a nice ring to it). A few alterations had to be made; so we hauled back what tools we needed and got to it. Roughly five weeks later, the house was ready. Well, sort of. We’re still putting on the finishing touches. We moved a basement entry door from the kitchen to a corner bedroom, thus allowing the small, galley kitchen to accommodate a full-size range and additional cabinet space. Our contractors added plumbing in the hallway, in order to install a convenient, stack washer & dryer unit. All the rooms received a new coat of paint, and the bathroom got a new storage cabinet.

For all of you old enough to remember the Ed Sullivan show, jugglers were a staple to his lineup. It was impressive to see one guy keep plates spinning, or knives flying through the air, never once crashing to the ground in disaster. With all of the chores we had to do around both of the houses, that’s what it often felt like. However, keeping everything in the air brings a Zen-like calm to life. There’s something very satisfying in knowing you’re on top of things . . .

....until one of your plates crashes to the floor.

Happily, that hasn’t happened….. yet. Oh, some plates (and knives!) have been spinning a little longer in the air than we originally planned them to. What was going to be accomplished this summer – painting the house, having the fire escape removed and the eaves restored – will all have to be delayed now. It’s been weeks since I’ve been able to do any refinishing work in the house. No matter. It’ll still be there when I have time. Our first renter is moved in and happily setting up house. We can come and go on the property at will.

At the start of the summer, someone asked me if I would be working anywhere during the break. I said my time would be spent working at both houses. "That doesn’t pay very much," he said. "Yes," I replied. "But the rewards are pretty incredible."

Gotta run. I’ve got a plate that’s slowing down a bit.

Tuesday, March 13, 2007

Rounding The Corner


At least as far as the contractors are concerned, this project is nearing completion. Completion of Phase I, that is. The guys were able to turn on the water, last week, and actually keep it on! No leaks. Everything seems to work just fine. Of course, it’s only had minimal use – drinks from the tap and an occasional flush. The real test wont come until we’ve moved in. . . and are doing laundry. . . and washing dishes. . . and taking a shower. We’ll observe a moment of silence, before the big test; and perhaps offer sacrifices to Poseidon right before we dedicate one of the numbers on our keypad to speed dial Roto-Rooter.

As I’ve mentioned before, much of what we have to do to the house is a matter of correcting the bad judgement (or bad taste!) of the previous owners. Rob spent all of last weekend correcting the walls in the laundry room. When we moved in, they were nothing but pads of insulation enclosed behind a clear plastic sheet. When Rob took out the old insulation, he discovered mold, an old mouse nest, and daylight where the wall and floor meet. The wall was nothing more than plywood sheets over the old back porch. In fact, they just put plywood over the original porch screen, never even bothering to take it out. Rob spent all weekend cutting 2X4’s to reinforce the wall and give him something to attach the sheetrock to. He then cut the insulation of fit between the studs.

Saturday, Dad and I rented a floor sander. I had heard that the "vibrating" type of sander is much better than the old drum style, so that’s what I wanted to try. We started on the corner bedroom; and, even with the coarsest sandpaper we could use, we saw little for our effort. It’s not entirely to blame, I suppose. The boards are pretty warped. It would take days of sanding just to create a completely level surface. Because it couldn’t get "down in the valleys," so to speak, the old finish remained. What was left over was a somewhat-finished floor. The old stain, safely ensconced in the many dips and valleys, gives the floor a speckled look.

We had finished going over the second room with the rough sandpaper when the sander started making funny noises. Then, large chunks of metal started falling out from underneath it. The machine was still running, but, judging by the size of those chunks, if we had continued on much longer, there would soon have been nothing left but the handle! We took it back to the rental place, and were braced for a fight. Thankfully, they refunded half our money, so it wasn’t that big of a loss.

The question remains what to do with the floor? We could try taking stripper to the remaining stain, but that would be a project of gargantuan proportions. We have enough of those without adding more. I might try to just put some stain down and see if it masks the old spot, or, at least, brings them into the fold. In the meantime, we’ll be looking for sales on area rugs. BIG area rugs.

The contractors have put sheet rock up on the dining room ceiling and given it its first coat of mud. They have one more coat of mud to put in the guest bedroom ceiling before they head on into the living room. After they’ve completed that room and the parlor, our storm door should arrive. They’ll install that and be done. Uh, with Phase I, that is. (They installed new basement windows, last week, and boy are they snazzy!!)

The bathroom is starting to morph into something actually usable. It is past its "desperately ugly" stage, as Bro Rob put it, to "nearing-its-full-potential" stage. I was able to get some color up there, last weekend, and that alone was a welcome salvation from the fire-house red of its past incarnation. There’s still a lot of trim work to do, and many a mitered cut to make before we sleep. But ah, to sleep, perchance to dream of finishing up with phase I – ay, there’s the rub.

Tuesday, March 6, 2007

Another Busy Weekend


The last week has seemed to be the turning point in our renovating project. Changes of real substance are happening quickly. Last Friday was a big day – our Corain countertops were installed. These babies are nice. There’s a lot of $$ floating around in that kitchen, but considering it’s a pretty important room (and in desperate need of attention), it seems a worthy investment.


We finished putting the trim back on the guest bedroom windows and doorways. This was a learning experience, as I’ve never done that before. I was so pleased with myself, Friday night, when I showed my first completed window to Rob.


"Wasn’t there a little strip of wood that goes under the top board?" he asked.


Sure enough, I had gotten it all put together and managed to actually leave a piece out. And I remember refinishing the blasted things, too! I felt really dumb.


I felt even dumber when, upon showing the bathroom window trim that I had put back on the wall, he again had to ask the same question: "Wasn’t there a little strip of wood that goes under the top board?"


I did it again!!


"See you in a hour," he said, and walked off to where he was installing a window in the laundry room. This is one nice window. It changes that little dungeon of a room to a much more cheery, pleasant place to be. Even from the kitchen – even from the dining room, for that matter – we can see out to the backyard, now. While we have that wall open, we’ll install a motion-detecting light on the other side of the window. (There weren’t any back yard lights at all on that house.)


The contractors were working on the bathroom plumbing, when they stopped, last Friday. We expect they’ll be finishing up with the bathroom this week. They’ll hook up the kitchen sink plumbing, dishwasher, etc, as well. Then I imagine they’ll start putting up sheet rock on the guest bedroom ceiling. If they are done with that by next weekend, we want to rent a floor sander and experiment with that room to get an idea of what the rest of the house will be like.


The last major thing to do in the kitchen is put in shelves. We expect that the little stuff -- wainscoting, baseboards, chair rail, etc. -- will be done long before that. That room will be ready to go well before we’re moved in.


We’re slowly coming out of this miserable winter, the moderate temps have made working in the house so much nicer. I can actually open a window when I put the poly on. It won’t be long before yard work will be beckoning to us. And with as much we need to do out there, we probably wont see the inside of the house again for weeks.

Monday, February 26, 2007

Renewed, Restored


As our blog title indicates, the whole goal is to bring back to life what has been allowed – either by bad taste or lack of interest – to deteriorate. This past weekend was a chance to Renew, Restore, and even Re-fashion, in a sense.

The greatest accomplishment, by far, was the results of the hours put in by Repair-O Man (a.k.a., Brother Rob). After following through with a suggestion from Rob’s mom: taking out the wall behind the built-in china hutch and opening up the middle section, the project just seemed to languish sadly in the kitchen. While everything else around it was being transformed, it sat dejected, waiting its turn at rejuvenation. Rob and I had a general idea as to what we wanted, but didn’t have the least little clue as to actually make it happen.

Repair-O Man had a plan.

We knew that the shelves themselves needed to be extended, but we weren’t sure as to just how that was going to happen. Sure, cut boards to fit, etc.; but how do you fasten them on? Screws? That would look tacky. Those funny, wrinkly nail thingys? That would look even worse. Repair-O Man came up with a solution that we would never have considered in a million years: joining the extension with biscuits. Yes, I said biscuits. With biscuits, wood glue, and about a million clamps, the shelves now came out flush with the wall behind it.

When we took out the wall (way, way back in January), we saved the old beadboard backing. Repair-O Man cut down the segments needed to enclose the top and bottom cabinets and reinstalled them. Adding some 2X4’s for additional support, he fastened sheetrock over that. The chimney that ran along the right side of the hutch presented a problem, in that the plaster had come off in jaggedy line. Repair-O Man just cut a piece of sheetrock to match the outline of the old plaster. The new then met the old and were joined by a hearty dose of mud later on.

The rest of the restoration falls on our shoulders, but that’s okay. This part, we can do. It looks like the kitchen could become the second room in the house to reach full completion. (And to think, I honestly expected to live with the big hole in the wall well beyond our move-in date!)

The rest of the weekend activities didn’t render quite the same dramatic results; nevertheless, they were equally as productive.

We said goodbye to the old claw-foot bathtub that had been in the bathroom since 1910 and, recently, lying on its side in the living room for the past two months. Rob and I scooted it out onto the porch and were happy to see it go the next morning, because, from across the street, it looked like a dead Holstein. Rob’s cousin came and picked it up (well, maybe not picked it up). It’ll find a new home in a house that is yet to be built.

Rob and I cut, fitted, painted, and installed beadboard panels in the bathroom. Specifically, the pieces that go behind the fixtures (as that’s what the contractors are getting ready to install). We figure it’s easier to do that now than later. We found that beadboard siding was infinitely cheaper than the paneling we bought for the kitchen. Since we were planning on painting it anyway, we used a heavy-duty sealer/primer to cover it front, back and sides. We also slapped some on the wall. Taking this measure, and also caulking around the edges, should ensure that moisture has little chance of working its way behind the panels and end up becoming vast civilizations of mold colonies.

This wont come as news to you seasoned restorers, but we’ve discovered that the little things – trim, baseboard, wainscoting, etc., end up taking more time than we originally imagined. It seems like you spend hours with little to show for it. Still, we know that it’s all part of the process. People who come over always say that we’re "really making progress," and we’re holding them to their word.

I imagine the bathroom will be nearly finished, by the end of the week. We should have the trim in the guestroom ready to put back on the walls by Thursday or Friday. On Friday, the "Installation Team" is going to come out and put in our – ahemCorian countertops.
Renew, Restore, Rejuvenate . . . and later, maybe, Relax.

Tuesday, February 13, 2007

Hard Work, but We're Doin' A Heck of a Job


Everyone who stops by and sees the house says that we’ve been making a lot of progress. With our project list growing, we at least enjoy having a variety of tasks to do. If we get tired of doing one thing, we can switch to whatever’s next on the list. Even though it might seem a bit capricious, things do get done and we have a better time. And, that’s what’s it’s all about, after all.

The contractors finished putting in the tile floor in the kitchen, laundry room and pantry. That alone has really given the room a finished look. The kitchen cabinets are finished. This past weekend, we started setting the cabinets. We got as far as the two cabinets of either side of the stove. Since we’re having the countertop made to fit it, we had to make sure the cabinet was precisely level and plumb. Then we had to screw it into the wall without messing up our measurements. No easy feat.

Last Friday, we borrowed the truck and hauled four 4X8 sheets of beadboard paneling, six sheet of sheetrock, and a dozen different boards of trim (i.e., baseboard, chair rail, quarter round, etc.). I spent much of the past weekend staining this mountain of unfinished wood. On this bare wood, I’ve found that you have to use at least 2 coats of stain ("Special Walnut") to give it an even look.

Rob filled in the space underneath the south kitchen window with sheetrock. It had been left open, when they put in the last set of cabinets.

Prior to doing any of these fun, indoor activities, we spent all morning, Saturday, finishing loading the dumpster. Even though we super-sized on the dumpster, we still managed to fill it up. We even took off the trellises on either side of the front porch and pitched them in there. Anything that was too big and bulky for our trash cart got pitched in. It’s amazing how much trash can come from a project like this.

Our lights for the kitchen and pantry came. The contractor installed the pantry light, and Rob tried to hook up the main kitchen light; but didn’t have any luck getting it to come on. I left a note for the contractors, today, and hopefully, they’ll be able to figure out the problem.
It really is starting to come together. The guys are going to start working on the bathroom, next. They want to get the house livable as soon as they can. It’s doubtful that a moving day would happen any sooner than mid-March, but that’s fine. There isn’t that much rush, and it’s been nice to not have to live with the chaos – just visit it.

There have always been surprises and new discoveries, ever since we got the house. An even bigger surprise happened recently when we got a call from the former owner. She was very gracious, as I expected her to be. What I found especially interesting was that she always wanted to open up that inside staircase. She was surprised to hear that we already did that.

Amazing Raze


If you’ve been following this saga, you know that this house has duo personalities. The bottom floor has an Edwardian-era elegance about it, while the upstairs, which had been converted to a self-contained apartment, complete with bathroom, kitchen (that had been built over the inside staircase), and outside entrance via a fire escape, looks and feels more like Ike and Mamie’s servant’s quarters. If we could not bridge the generation gaps between the two floors, then we were at least going to join the two floors period.

The only way this could possibly be accomplished was through the combined forces of Brother Rob and DESTRUCO MAN.

Opening a blocked passageway in a house is, I would imagine, just about as pleasant as opening blockages in people. However, within 30 minutes of arrival, Destructo Man had performed the necessary "ectomies": bathtubectomy, sinkectomy, and, er…. you know. Brother Rob successfully slayed the dragon on the opposite side of the wall – the old kitchen cabinets. In 1-½ hours, both rooms had been gutted and the wall between them sundered. Once those were gone, they were able to get to the blockage – floorboards that completely covered what had been an open staircase.

Destructo Man used his reciprocating saw like it was a butter knife. Without thinking twice, he sliced off whatever was in his way: pipes, sheetrock, floorboards, toes (not really), 2X4’s . . . you name it. The huge floor joists were severed neatly at the stairwell walls, and for the first time in, probably, 50 years or more, you could see all the way to the top of the second floor ceiling from the downstairs.

Even with a break for lunch (which was catered!), Brother Rob and Destructo Man were finished in less than 5 hours! Amazing! They left behind an upstairs screaming with possibilities and a small mountain range of debris in the backyard that just makes you scream.

It feels like we have a whole house, now. No more having to brave the cold and fumble around for another key to visit the upstairs. We both agree that whoever did the original remodeling did a pretty good job. It was a very clever and economical use of space. Still, we’re glad it’s back to where it started from. Now we see some new options we hadn’t considered before. Even though the upstairs is part of the second phase of the remodel, it’s nice to know it’s ready to go anytime. That’s something we couldn’t have possibly accomplished on our own.

Tuesday, January 30, 2007

How Hard DO We Want To Work?


It was a deeply philosophical question that started this week, and it came from a rather unlikely source – our contractor. After getting home from work, I stopped by the house to see what they did that day. I was really pleased to see that they had built the "box" that the washer and dryer will sit on. This "box" covers an old outside entrance to the basement. The space underneath made a convenient area to run the plumbing through. When the previous owners enclosed the back porch and converted it to a laundry area, they just covered the old outside entrance with a ¾ inch sheet of plywood – and that’s all that their washer and dryer sat on! Now it has an amply supported riser that compensates for the slope in the floor. Not only is there plenty of room for the washer and dryer, there’s also enough room to stand on it without falling off the edge.

After properly admiring their day’s accomplishment, they posed the aforementioned "philosophical" question: "How hard do you guys want to work?"

"What do you need done?" I asked.

They went on to explain to me that, if they added yet another layer of underlayment and tile on top of what was already three layers of underlayment and old linoleum, there would be a rather formidable step up into the kitchen. A possible hazard, for sure. This could be resolved by taking out the old linoleum and underlayment. You end up with a minimal rise at each threshold.

That’s all they were requesting.

"Tell ya’ an easy way to do that," one of them said. "Just set your skill saw on 5/8 inch and buzz down each one of these lines in the linoleum pattern. Make each section about a couple of feet wide, then turn around and do the other direction."

Hmm… I thought. Kinda like cutting a cake. How hard can THAT be?

"You’ll probably mess up your blade, but it’ll save you a heck of a lot of work."
I didn’t think it sounded like something too much out of our reach, so I agreed.

"When do you need it done?" I asked.

Almost gleefully, he replied, "Just whenever you guys can get around to it would be fine."
"Well, we’ll probably start on it tonight. It’ll be a nice break from painting."
"Great, we’ll get our stuff out of your way."

I should have known by how their eyes lit up when I agreed to their assignment that they had more of a grasp of just what kind of a job it would be than I did. In no time at all, they had removed their scaffolding they were using to work on the kitchen ceiling; and all their tools were ensconced in the other room. With a cheery wave, they were out the door for the rest of the day.

"I kinda accepted a job for us," I prefaced my announcement to Rob that evening over supper.

"What kind of job is that," he asked, his eyes widening.

"Well, R asked me how hard we wanted to work, and I told him we’re up to just about anything," I explained. "They need us to take up the old kitchen floor down to the original flooring."

His spoonful of chili froze halfway between his bowl and his mouth. "What now?" he asked.

After hearing an explanation, he agreed as I did that it sounded like something we could handle.

What were we thinking?

The skill saw was pushed to its maximum capacity. We made long cuts in a north/south direction on the old kitchen floor. The sawdust filled the air with its brown silt burnt by the fierceness of the saw blade. Smoke started rolling out of the motor. Time to give it a rest.
Without making an east/west cut in the floor, we got out our Christmas pry bars and started working at the long sections. We figured the first section was put on with railroad spikes. The next layer under that was different. A weird smell reminiscent of model airplane hobbies wafted up from the floor as we pounded and pried off the old materials. That distinct smell must have been the glue that they used on one of the floors. It was coming alive again!

It was an evening for "kitchen archeology," in a sense. The top layer was a relic of the early ‘80’s, we figure. The one underneath it had to have been from the ‘60’s. It was an aqua-green color with a pattern reminiscent of colonial-type decorating, a style that was popular in upholstery and curtains, when I was a kid. Underneath that was a type of fiberboard underlayment that just came off in chunks instead of the nice, neat, "cake-like" pieces we were promised.

After about an hour, we made it down to the age of dinosaurs – the first linoleum the kitchen ever had. It’s an interesting "pattern," if you can call it that. Really, it’s nothing more than a swirl of colors: reds, greens, grays, blues…. you name it. It kind of has a marbleized effect. Very interesting and not all that bad looking.

"I think that’ll be good enough for them to work on, don’t you?" I asked Rob.

We decided to just leave the last layer alone. It was stuck down with no less than one million tiny staples. After wrestling with the previous layers, we weren’t about to go around and pull each and every one of those staples.

"It won’t create too much of a step-up, if they put the underlayment on over that," I said. "Hey, look. The basement door opens up all the way, now!"

The basement door had always just stopped about halfway open. When they added flooring and underlayment, they never bothered to trim the bottom of the door. They just learned to live with the door’s impaired capacity. Now it’s got its old swing back, just like a lot of features in the house will when we’re done.

After taking another hour to clean up our mess, we slapped the dust out of our clothes and hair and called it an evening. How hard do we want to work? Don’t even bother to ask.

Monday, January 29, 2007

The State of the Mess Address


My Fellow Amar’kuns . . .


Today, January 29, marks our first month’s anniversary of closing on the house. I won’t go into any summaries as to what we’ve done up to this point, as you can scroll down and read for yourself (if you’re THAT much of a glutton for punishment). But I do need to catch you up with what has been happening this last week.


It’s been a busy week in Lake Snow-Be-Gone. To begin with, this past week was the first for our contractors. They got started on Monday, mainly just delivering tools and supplies, setting up shop, etc. Tuesday, they rolled up their sleeves. As we have a bit of a deadline looming with the kitchen, that’s the room they started with first. They got started adding the electrical: about one million outlets and switches, with tons of wiring for the garbage disposal and dishwasher.


They also saw that the lead pipe for the kitchen sink was badly held together with clamps that weren’t the right size to begin with. They completely replaced the old lead with new plastic plumbing.


Each light in the kitchen will have its own switch. We have a main light and two pendants. One pendant will hang behind the china hutch and that will be the light we leave on at night and when we’re gone. The other pendant hovers directly over the sink. We found a great web site ("Progress Lighting") and ordered some really cool lights for the kitchen. (One interesting aside – the contractors discovered the old gas pipes for the lights in the house were still in place.)


Their electrical work took a couple of days. By Thursday, they had started putting up the sheet rock on the ceiling. We had also asked them to install a light in the pantry (it never had one!). They finished the sheet rock on Friday, in addition to doing the electrical for the washer and dryer.


In the meantime, our stalwart renovation heroes –Rob and I--had plenty of work orders to fill. I finished stripping the kitchen side of the china hutch early in the week, so I wouldn’t worry about getting the new floor messed up. Rob insulated the bathroom window, and I put the final coat of paint on the pantry trim.


Tuesday night was exciting: We took out the old claw-foot bathtub. Rob’s cousin had expressed interest in it, and that’s all it took for us to just GIVE it to him. Still, we wanted to get the bathroom – the "desperately ugly" bathroom, as Brother Rob called it – ready for the contractors. It was unimaginably heavy. As my sister-in-law remarked, "Imagine that full of water, someone in it, and on the second floor!" We managed to scoot it out on old towels and place it close to the front door. I had no idea that the legs on those old tubs just slide into a bracket-like thingy. That’s all that holding them in place! Amazing.


Wednesday night was truly memorable. There was one more thing left to take out of the Desperately Ugly bathroom. You guessed it. We saved the "best" for last. Rob went to unbolt it from the floor, twisted the wrench around a couple of times, and the bolt just came up in his hands. It was completely rusted out. That – ahem – "fixture" was just setting there, not bolted to anything! Winter’s early cloak of darkness was a mercy, this time, when we carried that – ahem – "fixture" out to the backyard.


Our contractors suggested that we take out the aluminum and clapboard siding on the east wall of the laundry room, make a box out of 2X6’s to go around the breaker boxes, and go back with sheet rock over the whole wall. Slap a door on that box, and the garish breakers are hidden away. That’ll neaten up that wall immensely. Rob devoted one evening to taking off the siding.


Up until last Friday, if I wasn’t stripping, I was staining. All the woodwork for the guest bedroom has been completely stripped, and I managed to get some pieces stained. The closet door, in particular, turned out especially nice. The "Special Walnut" stain is a tad bit darker than what we had originally planned, but we sure like it a lot. It evens everything out and gives it a very deep glow.


Now, I’m not one for product endorsements (especially if they aren’t paying me), but, for you strippers out there, if you’re like me and get frustrated with that final bit of residue that refuses to come off, then you need . . . sound cue . . . CITRISTRIP! Yes, CITRISTRIP will take off that pesky gunk from the surface of the wood, leaving behind bar-nekkid wood. Honestly, this stuff is good. The only trouble is, it’s pricey. I’ve managed to find some stores that sell it cheaper than others, though. At any rate, I just dab some on to a finishing pad and then rub away at the surface until I see that it has removed the old gunk. Then – and they don’t tell you to do this, either – I just take a rag and wipe off what’s left. It comes out looking clean, clean, CLEAN. And the smell won’t send you fleeing into the streets and forgetting your first name, either.


That was your first tip for the day. Here’s another tip: Never, NEVER sneeze while wearing a respirator.


Our kitchen cabinets that we ordered three weeks ago finally arrived on Friday . . . late Friday morning . . .late, LATE Friday morning, to be precise. These are unfinished oak cabinets with concealed hinges (do we need a permit for that?). Anyway, I managed to sand and stain the cabinets before the sun went down, that day. Even with one coat of stain, they looked pretty. The next day, I slapped on another coat of stain in order to darken them a couple more notches. By the end of the weekend, they had two coats of stain, one coat of polyurethane, and I had the cuticles of a coal miner.


All weekend, Rob got walls ready – i.e., sanding, taping, etc. – while I followed him with a paintbrush. The pantry now has a pleasant, citrusy look to it, and those poor walls of the guest bedroom finally have a little color to them. It’s amazing what a bucket of paint and a brush will do.


One of the charms about living in a house this old is that you’re surrounded by real wood – no particleboard here. Also, one of the frustrations about living in an old house is that you’re surrounded by REAL WOOD. This is only frustrating when you have to put it back where it came from. Rob found this out firsthand, when he went to reinstall the trim around the windows. Even drilling a hole didn’t help. That wood put up quite a fight, when he tried to hammer those nails back in. By the second window, he discovered that by drilling a little deeper, that seemed to take some of the fight out of it.


When you’re deep into home renovation, like we are, you manage to derive entertainment from the most unlikely of sources. For example, I don’t know how many evenings we’ve spent just looking at LIGHT FIXTURES online. I’m not kidding! Rob happened upon a phenomenal web site for ordering lights: Direct Lighting. Now, this isn’t a product endorsement, mind you; but we’ve never found a better source for the kind of light fixtures we need. They literally have thousands of lights to choose from, in all different price ranges. We spent an hour, one evening, just going through their online catalogue – and we didn’t even get through HALF of it! Anyway, that was your other tip for the day.


. . . So, in conclusion, my Fellow Amar’kuns . . . we’re making progress. Oh, it’s hard work, but we’re doin’ a heck of a job. In spite of the tedium of winter (who would have thought January would be so downright nasty?), we’ve managed to always get something accomplished. Maybe we’re not quite as far along as we had originally envisioned, but, being the easy-going Deciders that we are, we’ve managed to flow with the punches.


And that’s this week’s news . . . where the nails are strong, the paint is good looking, and the refinishing is above average.

Monday, January 22, 2007

It's Starting To Get Interesting Now


In spite of heavy snowfall and dire predictions from the weathermen last Saturday morning, we faced the weekend’s project list with great alacrity. (Alacrity! I’ve always wanted to use that word. My next favorite word: sagacity.) Before the storm got too bad – and before we were to meet J, our contractor, at the house with his completed proposal – we had to make a quick trip to our beloved Big-Box Store.

On our To Do list this weekend was painting the kitchen. Being fans of Home & Garden TV, we knew that a critical ingredient for this chore is paint. We walked into the store with one color in mind and walked out of the store with an entirely different color in our shopping cart. "American Tradition" had a huge display, and we didn’t count on being seduced by the enormous variety. Time was running out. The roads were getting worse by the minute. The pressure was on. Choosing paint is like foreign policy –if you don’t get it right the first time, you suffer the consequences for a LONG time to come.

Based largely on finding something that would go with our countertop, we picked out "La Fonda Sombrero" for the trim and "Tomato Bisque" for the walls. The wall color looks like tomato soup thinned down with milk. I’m not kidding. It looks just like a soup I make with black-eyed peas, ham, tomato and milk! It has a nice, warm, creamy type appearance (minus the ham and beans). When the sun finally came out the next day, the colors on the wall gave the kitchen a nice, warm glow to it.

We had just enough time to get back over to the house before J showed up. This was the big day. Since we added a few more things to his To Do list, he had to go back and refigure his estimate. His original estimate was much, MUCH lower than the other guy’s; and even with these additional requests, we still expected a figure that wouldn’t make our eyes roll around on the floor like olives.

We weren’t’ disappointed. We gladly signed on the dotted line and were equally as thrilled when he told us they’d start on the job Monday. WHOOPEE!!!

We had no time to waste. Since the kitchen cabinets are being delivered this Friday, it was agreed that a new floor would be first on the To Do list. In the meantime, we could do a lot before that. The kitchen walls were just about the worst in the house. Hairline cracks scored the surface, giving it a crazed look, like the glaze on old china. Rob spent all morning and some of the afternoon filling in the cracks with plaster. After the plaster had dried, he lightly sanded the surface. Sometimes, he’d have to go back and re-apply plaster.

He slathered goop on the walls while I started painting the trim in the kitchen. This color is just a couple of notches darker than what we picked for the walls, which is exactly why we picked it. It kinda reminds me of pumpkin pie before it goes into the oven, which is not why we picked it.
Before that, though, I had to fill in all the holes in the window trim that the shelf brackets had left. There were some nasty gashes in those old boards. After the wood filler had time to dry, I lightly sanded it down. Two coats of the semi-gloss paint also helped to level out the surface.

The fun thing about this project was that we could paint with wild abandon and not care if we dripped on the floor. We got some dandy looking walls out of it, but that old linoleum floor looks like a bunch of kindergartners had been given unsupervised time with paint brushes.

While we were at the Big-Box Store, I picked out a can of stain (MinWax, Special Walnut 224) that I thought I’d just "audition" on a stripped piece of woodwork. We had originally talked about finishing with a light stain; however, there were some inconsistencies in the refinishing process that worried me. (Meaning, a lighter stain would highlight all the places that I missed.) I thought something in-between light and dark – like medium, perhaps – would even things out nicely.

It did. As you can see by the picture, it brings out the grain nicely; and if you stand back far enough – say, to Des Moines – you don’t see all the spots of old paint and varnish that I didn’t get out.

By the end of the weekend, we were tired, virtually snowed in, and very pleased with the progress. The kitchen walls and trim are painted, and the pantry woodwork has its first coat. We picked out a stain for the woodwork, and we officially have a contractor! Planning, work, help from others, and maybe even a little sagacity got us to where we are today. (Ha! I got that word in too!)

Monday, January 15, 2007

What We Did On My Three-Day Weekend


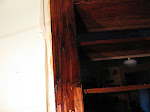
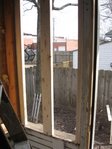
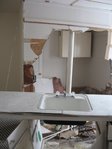
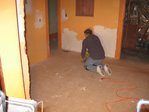
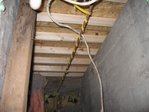
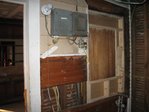
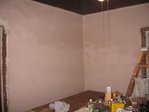
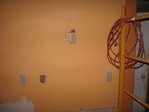
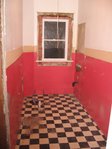
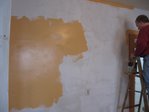
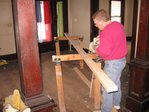
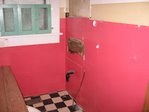
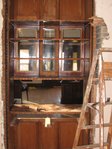
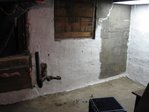
"What you guys might want to do . . ." was all our contractor had to say to us. The next day, we followed through on his suggestion and had the north wall of the laundry room sundered right down to the studs. How easily led we can be. This will save them precious time, when they move the plumbing for the washing machine to inside the north wall, providing a nice, neat, discrete home for all those pipes.


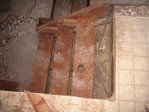
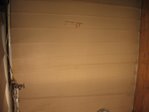
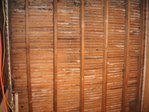
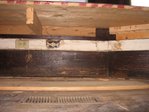
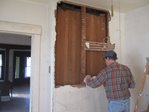
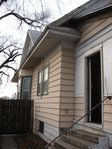
As you can see from the pictures (above and side), this had been an outside wall at one time. There was aluminum siding, to begin with. After we figured out how these little babies interlocked, it came apart fairly easily (hopefully, we’ll be able to reuse the siding when we turn the upstairs door back into a window. Just past the layer of aluminum was foil-backed paper with a shiny side towards the house. When this tore off, it unveiled the original clapboard siding. It looked so cute! But it had to go. Nothing our big Christmas hammers couldn’t handle.


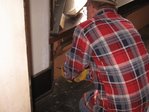
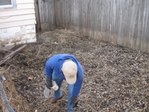
It was about this time that Brother Rob called and wondered if we were working at the house. I had to go into another room to hear him above the hammering from the laundry room as Rob pried off piece after piece of the siding. "Uh, yeah, we’re working!" I said. "Say, our contractor suggested we take out a wall down to the studs. I’m not sure if we’ll need any special tools to pull this off, but it might be a good idea to bring whatever you can think of."


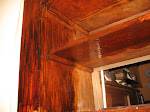
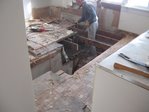
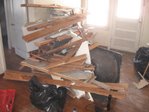
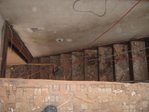
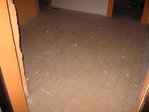
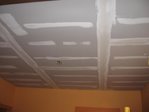
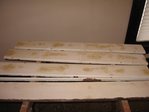
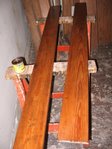
Thankfully, he brought his reciprocating saw. Had we not have had that, we would have been stuck right after we got the clapboard siding off. There underneath those brittle, old, thin strips of siding were some hefty 12-inch cedar sheathing boards. With the reciprocating saw, Rob was able to cut right up to the last stud before the wall. The saw cutting into the old cedar made the room smell like camping in the mountains. With the help of our Christmas pry bars, Rob and I were able to wrestle the sheathing boards off the studs. Behind every board were pockets of insulation. There was blown-in insulation packing every nook and cranny. I gotta say this, they did a good job insulating that house. For just this one, small wall, we ended up hauling out four big trash bags full of insulation. The old clapboards were not salvageable, but that cedar sheathing will make for some dandy lumber to have on hand.


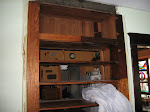
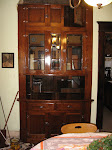
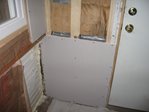
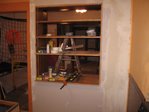
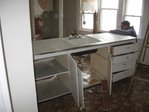
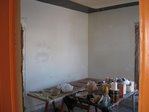
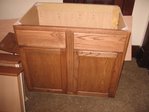
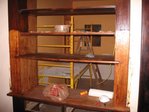
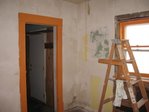
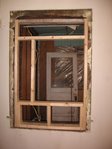
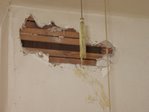
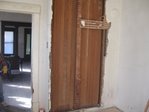
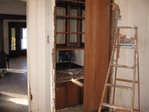
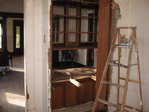
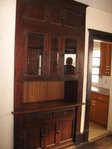
After lunch, it was time for Rob and I to get serious about how the spice cabinet (a.k.a., old medicine cabinet) was going to be installed into the hole where the superfluous window used to be.


By this time, Brother Rob had gone off into the refinishing room to work on boards and listen to a basketball game on the radio. Rob and I stood at the hole in the wall pondering what should be our first move. Our confusion must have been palpable, because Brother Rob walked back into the kitchen, suggested a plan of action, and then went back to his refinishing (and basketball).


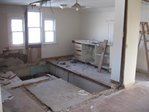
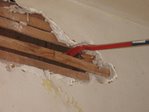
Now that we had a plan, we were off and running (follow side pictures). We had enough 2X4's left over from a project last summer to handle it. We first framed in the old window opening, giving the sheetrock something to attach to. Then, we put a board going across the bottom at just the height we want the spice cabinet to hang on the wall. We supported that board with three cripples (another new term for me).


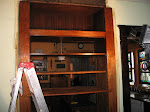
We were trying to get the spice cabinet centered with the hole in the wall when Bro Rob came in to point out what should have been, well, OBVIOUS – "You know, you don’t really have to have it centered with where the window went. You’re going to put sheet rock around it anyway, no one would notice."


"I like it when you walk into the room," Rob said. To which, Bro Rob went back to his refinishing project.


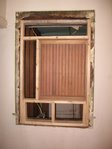
We set the spice cabinet as close to the center of the wall as we could. We ran a 2X4 along its north side, boxing it in. Now, it won’t actually be installed until I get it stained, which could be anytime between now and Halloween.


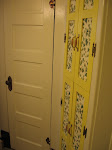
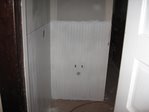
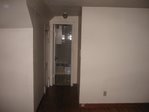
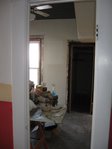
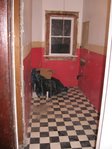
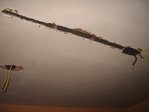
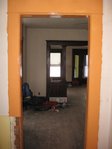
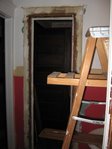
Rob was in the mood for more destruction, so he took out the door that goes from the bathroom into the middle room. We had planned on sealing off this door, since having three doors going into a bathroom seemed to heighten the, shall we say, "surprise potential?" Rob took off the door and trim boards, carefully labeling them after laying them out in the middle of the dining room like some chalk outline of a murder victim.


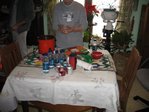
All of these projects took us through to the end of the afternoon, and it was time to close up shop for another day. As I said, everyone has been getting involved with this project; and, tonight, we had Sister Deb’s famous crock-pot soup recipe (see side picture) to look forward to. (And was it ever YUMMY!)


Have I mentioned that the weather has been miserable? The next day was gray – and not even a pretty gray at that! The wind cut through you like saw blades. We knew this for a fact, because we decided to be one of twelve people out on the road to join the other fifteen people at our favorite Big-Box Store. There were so few customers there, not only did employees actually ask us if we needed help, but the ones that weren’t sitting comatose in front of their computer screens were doing anything to keep busy. I actually saw one guy dusting the parquet floor display! ("Toekick" was there. She was busy, as always. I hoped that she had breakfast, at least.)


When we left our beloved Big-Box, ice was falling from the sky as if dispensed through a shaker. We wanted nothing more than to get back to our home(s) and, oh yes, to have it be the middle of June, if it wasn’t too much trouble.


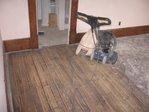
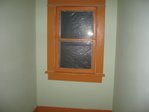
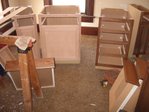
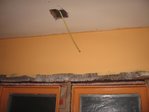
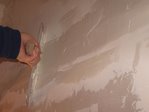
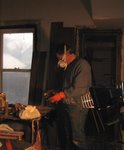
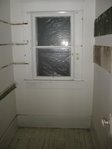
I spent most of Sunday refinishing boards and finishing up the door I had started earlier in the week. Rob donned his dust mask and insulated around the window frames in the kitchen. "I can see all the way to the outside," he hollered to me in the muffled tones that we’re used to communicating in. The dust masks and respirators give a haunting, otherworldly timbre to our voices. (Not to mention, it also makes me look like Darth Vader.) Since most of the window sash cords have long been broken, we’ve decided to just stuff as much insulation into the cavities normally reserved for the window weights (thereby restricting the viewing area to the actual glass portion of the window).


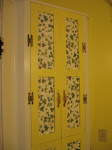
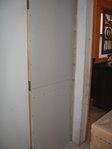
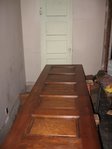
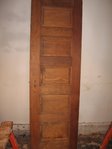
I was able to finish one door, Sunday. Both sides, I might add. It was the first door I tackled, and I thought I’d play it safe with making it a closet door. As you can see (side picture), it didn’t turn out too bad. I picked up a product at our Big-Box Store that did an especially dandy job of cleaning up the residue the paint stripper leaves behind. When I talked to Dad later that evening and mentioned the product, he told me he used something similar for the final clean-up job – paintbrush cleaner! Since I can get that by the gallons for the same price I paid for a 16-oz. bottle of the other stuff, I’m pretty sure I’ll be making the switch to the paintbrush cleaner.


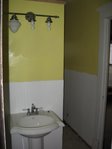
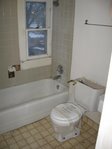
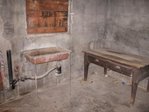
For his final act of destruction for the weekend, Rob removed the bathroom sink that clung to the wall opposite le toilet. We cleaned up the work site, carefully worked our way down the front steps caked with snow and ice, and headed back to our house across the street – where a hot shower and plenty of leftover vegetable soup awaited us.
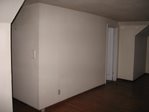
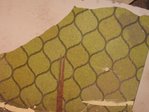
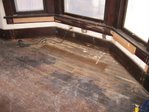
Monday, January 8, 2007

"We Can Do It! We Got Big Hammers for Christmas!"


We finally received our first estimate. It goes beyond "Eye-Opener." It’s more in the category of "Total Socket Removal." After the contractor presented his proposal, and we picked ourselves up off the floor, we walked him through the downstairs one more time. We were able to persuade him into breaking the job down into "Phases." Phase One, Phase Two, etc., all the way to, probably, Phase Seven Thousand and Fifty Three.
After the gentlemen left, Rob and I sat quietly in the dining room, the dust still settling from our tearing out plaster earlier that afternoon. Suddenly, Rob said to me, "We can do this ourselves! We’re smart. We can follow instructions! We got big hammers for Christmas!" We came to the mutual decision that there were just going to be a few more jobs that we were going to have to tackle ourselves, rather than relegate it to the contractor's team. "It’ll be a learning experience," I offered hopefully.
We’ll see how far we get. The contractors will come back to us in a day or so with a (hopefully) pared-down estimate. We still will need them to do most of the work in the bathroom, and at least put a floor in the kitchen. The rest are jobs that we will simply have to handle as the time and money presents itself.
But, before I get too far ahead of myself, I need to fill you in on all that’s happened since the last installment.
Last week, we spent three consecutive nights in the Kitchen Department at our favorite Big-Box Store. We consulted with a very helpful and amusing lady I’ll refer to as "Toekick." That wasn’t really her name, of course. It’s just a word pertaining to the cabinet biz that I learned. (Still, it would make someone a great first name, wouldn’t it?) Toekick reminded me of that perky gal on Dobie Gilles, the one with the short hair and tomboyish attitude. For three nights in a row, Toekick’s hands flew over her calculator, she carefully sketched out floor plans with her template and company graph paper, she went through book after book, looking up prices and item numbers. Sometimes her numbers and measurements weren’t entirely, shall we say, consistent, since she would occasionally work through her supper and bathroom break. Still, by the final evening, we had a plan that everyone could agree on. (It took longer to order the kitchen stuff than it did to close on the house!) Toekick tallied up the numbers, wrote out an invoice, and headed us to the customer service station where Rob wrote a check for our new cabinets and countertop. The cabinets will be delivered on the 26th. As soon as we have those finished and in place, we notify the countertop installation guy. He comes in, makes a template; and, in 10 days, we have our countertops.
Sounds easy enough, right? Well, in-between now and then, there’s the little matter about the kitchen floor. Namely, getting one! We were able to tear out the bottom cabinet’s Friday night. As you can see by the pictures, there was a bit of an open wound behind the sink base. We didn’t do that! It was like that when we pulled the cabinets out from the wall. They simply never bothered to sheet rock the area where the plaster had come off. Happily, though, we made the discovery that, at least in this part of the house, they had blown in insulation.
Saturday was taken up mostly with painting the basement. We gave the ol’walls a cheery, rosy blush; and it looks so much better, if we do say so ourselves. We hauled a couple of the base cabinets in the kitchen downstairs and will use those for a workbench. Mom and Dad stopped by that afternoon. Dad brought the old medicine cabinet that I gave him on New Year’s Eve to strip for us. It had been original to the house, as it had the same egg-and-dart molding as the window and doorframes. He got it cleaned up really, really nice; and we’ll be installing it in the wall of the kitchen where the superfluous window is. It’ll make a dandy spice rack. (Mom also gave us a pan of spinach lasagna that she just "happened" to have left over. At this point, we don’t question – we just take.)
Saturday night, Rob started taking down the picture rail that hung in the living room. The rail had been placed on the wall particularly high – within a half inch from the ceiling! We decided to lower it to just slightly below the top of the window and doorframes. They had been painted, naturally; so I was eager to start cleaning them up to see what they looked like underneath. The paint was something I had never encountered before. It had a rough, chalky texture to it. When I put paint stripper on it, it didn’t bubble; it just kinda sat there. When I started scraping it with a putty knife, it just turned into this weird, glue-like substance. It took several tries to get it cleaned up enough to the bare wood below. I was happy to see that, underneath that paint, there were a series of tiny, narrow grooves that ran just below the thickest part of the rail. It was buried beneath all that paint. I have a feeling this stuff is what they call "milk paint." This is stuff that’s made from a powder (and, yes, from milk); and they used to use it all the time. You can still buy it today. Purists prefer it to anything else. Maybe, someday, we’ll be that good too.

On Sunday, we gave Rob’s mom a tour of the progress we had made so far. Upon seeing the kitchen, she urged us to take off the plaster from the wall behind the built-in china hutch. It was badly, badly cracked and needed attention desperately. At one time, we had considered opening the back of the hutch and creating a pass through. She revived that line of thinking for us, and that’s why on Sunday afternoon . . .
. . . we took out our first wall! Well, we didn’t actually "remove" a wall. And, I guess "we" didn’t do it at all. Brother Rob came by in the afternoon. I told him what we were thinking about doing. Before we knew it, he grabbed one of the big hammers we got for Christmas, started at the top part of the wall, and, within just 12 minutes, had all of the lath and plaster off and the back of the china hutch exposed. Rob and I couldn’t sweep up and haul out that dusty stuff fast enough. Interestingly enough, you can see black hair sticking out of the chunks of plaster. That was a binding agent for wall plaster, back then. We wondered how many horses (or cows?) it took to make our house!
After Bro Rob did his share of destruction with the hammer, he abandoned us to go work on refinishing boards in the other room. I started taking off the old beadboard from the back of the hutch. Rob was eager to destroy something, too; so he got to work taking out the bench that had been installed in the bay window area of the dining room. By the time I had finished removing the last board from the hutch, Rob was almost done with his little project. We discovered, hidden underneath the bench, another three-way plug as well as an outlet for a window air conditioner. Just opening that space up makes the room look so much bigger!
I have to decide how to put the hutch back together, now. We want to keep the shelf area see-throughable. I’m thinking of make a frame with similar configuration to the front and putting clear or opaque glass in it. We’ll have the electrician install a pendant light that has its own switch and hang it right above where the top shelf starts in the china hutch. This would be the light we’d leave on at night and when we were gone. When we get stained-glass panels made for the front doors of the hutch, the pendant light in the kitchen should shine through, making it very impressive from the front. That’s the plan for now, anyway.We’ll put backs on the enclosed parts of the hutch. This presents some interesting challenges as to sheet rocking in order to make it come out even with a wall that is at least two inches out from the case of the hutch itself. (It you want to consider this an SOS, be my guest.)
Well, getting back to what I started talking about, the Oh My God estimate. After our experience earlier that afternoon with plaster tearing out (not to mention, breathing in); we decided that we could handle more jobs than we had originally thought. Why should contractors have all the fun? For our part – and anyone else who might want to join in our reindeer games (hint, hint) – we will be tearing out the upstairs bathroom and kitchen and, yes, opening up the stairway ourselves. As Rob said, "We can do this! We’ve got big hammers for Christmas!" We’ll take out a wall upstairs and get everything ready for the contractors to – some day (remember Phase Seven Thousand and Fifty Three?) – build the walls and put in the new bathroom.
Ambitious? Yes. Crazy? We have to be. Hey, you’re talking to two guys who are eating, sleeping, breathing and dreaming about house renovation. You think I’m kidding about the dreaming part? Someone very close to this project – very, very close to this project – said he had a dream the other night that we had to re-insulate the house with ice cream. In the dream, this was vexing to us only because we couldn’t make up our minds as to what flavor to use.

Thursday, January 4, 2007

Happy PHEW Year!

We’ve never started off a New Year quite like this. After 10 hours of painting downstairs and patching upstairs, we felt like we had been trampled by the crowd at Times Square. For the outside walls of the basement, we used "Dryloc" – paint with the consistency of glue mixed with sand, kinda like when I try to make gravy. For the inside walls, we just used a concrete primer. As you can see (and compare with "before" photos on the side), it’s already a big improvement; it actually enlarged the basement. I know this for a fact, because I made at least two trips to the Big-Box Store for paint.

The aged masonry sucked up that goop like Ray Milland in The Lost Weekend. For all of the past 97 years, the only attention that’s been paid to those walls were a few segments where it appears someone’s child made a half-hearted attempt to give it some color with a type of green usually reserved for the Sunday comics, stopping when it got complicated around the hot water heaters and the stairway. The best that I can determine, they used something akin to Easter Egg coloring. When I was washing down the walls to prepare it for the Dryloc, that icky green whatever started to come alive! It turned my hands, my rag and my wash water green not to mention started running down the walls like some kind of alien plasma. Even when we painted it with primer, that stuff would reactivate; and the green would ooze through the thick white paint. If I didn’t aggravate it too much, it would stay in one place. I’m hoping that it’ll stay sealed in and not permeate the next color we put on. (Anyone have a clue as to what this weird stuff is?)


We plan to give the ol’ gal a little rouge in her cheeks, and go back on the walls with a light, light, light rose color. That should give it a nice, inviting atmosphere.


We took out that mysterious sink down there (the one that appeared to have a garbage disposal attached to it – see picture on the side.) Now, once we patch that open cavity that was formerly the coal chute, it’ll be a nice, neat area for setting up grow lights for the outdoor plants we want to keep going through the winter.


Rob spent several hours patching cracks in the plaster upstairs. One of his earliest ambitions was to vacuum the tops of the window and doorframes. Since the previous occupant had several cats (and, apparently, little time for housecleaning), their hair made a soft carpet in the most unlikely of high places. Honestly, there was enough hair up there to knit together a Cats revival. His artful repair to the varicose-vein like cracks in the plaster make the walls look like interesting maps with little white roads leading off in all sorts of directions.


I should mention that New Year’s Eve was productive in its own right. Brother Rob came over in the afternoon and worked for 3 hours rehanging the front door and installing the dead bolt lock. (If this were a client/attorney relationship, I would have been broke by the end of the afternoon.) The previous owners had so much weather stripping on that door that it wouldn’t go shut entirely. Rob took that off, reset the doorjambs, and now it goes shut with a satisfying thwump.


On the day after New Year’s, I was actually able to spend some quality time with an employee in the Kitchen department at the Big-Box Store (okay, I won’t be too cagey, it starts with an L). They have a special promotion for all of this month – buy at least 2500 square feet of Corian countertop and get a free Corian sink. The sink that we really like – normally $650 – is included in that free offer. The only problem is, we will probably have to special order the cabinet base units, as we have some funky dimensions in our old house. We also insist on having the kitchen sink rest precisely in the center of the two huge windows. ("I don’t think I could handle it if it wasn’t," Rob confided in me. "I’d feel off kilter the whole day.") This special order wont be in for another 3 to 4 weeks, pushing back our anticipated completion date for the kitchen. In the meantime, the contractors will have to get the kitchen floor ready before anything else (that is, after they call us with a little, minor detail known as ESTIMATES).


Now, I know Corian isn’t "authentic," when it comes to redoing an old house; and we risk the consternation of the purists among us. However, it’ll be a room we spend a lot of time in; and, on this point, we’re willing to sit glumly in the corner with the rest of the apostates.


For added countertop space, we plan to incorporate a base unit of an old kitchen cabinet that I restored several years ago, with the help of my Dad. At that time, we added a top to it and it’s currently used as a Fiesta hutch. We’ll remove the cabinetry on top, slap a Corian countertop on it, and it should make a dandy island with plenty of workspace and storage.


Of course, when there’s nothing else more pressing, there’s always the little matter of stripping three layers of paint off the baseboards, window and door trim in the guest bedroom. We actually have a handy little setup in that room. Since we’re redoing the floor anyway, we don’t worry about the mess. Let the gunk fall where it may! Now that I’m regularly using the respirator when I’m in there, the conscience-altering fumes don’t bother me nearly as much. However, I do miss not being able to channel Elvis like I used to.