


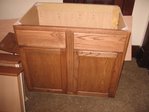


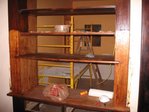


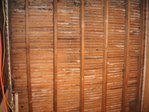


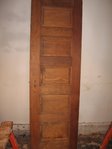


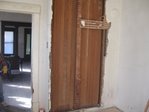


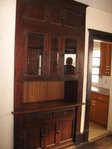


One of the favorite features of our old home is a built-in china hutch that occupies a prominent space between the dining room and kitchen. I had started stripping the hutch last January in a "fit of good intentions," as one writer put it, thinking I could knock it off in no time at all. I only got as far as the two bottom shelves when other matters – namely, kitchen, bathroom and floors – distracted me. Brother Rob extricated several doors, when we were gone one day. He returned them a few days later so nice and clean, you could practically have eaten off of them.
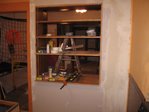
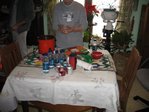
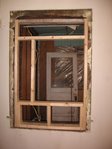
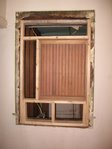
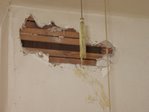
For months, the hutch sat forlorn, half-naked and partially disassembled. The old finish that did not get scraped off when I last applied stripper dripped down and hardened on the bare wood below. The thick, black gunk lay in frozen rivulets across the front of the cabinetry like tear-streaked mascara. The belle of the dining room stood weeping, her shelves that once held heirloom china now a convenient repository for hammers, screwdrivers, prybars, drywall screws, duct tape, a paper plate with doorknobs and screws, caulking, paint brushes, steel wool, cat toys, weeks-old newspaper, Target shopping bags . . .
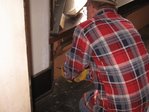
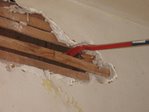
At the commencement of OPERATION FACE LIFT, I turned off the central air, opened the dining room windows, strategically positioned fans to move air both on and away from the work site, rolled up my sleeves and began. I decided to switch to a stripper that is supposedly safe for indoor use. This is not a choice I would normally have made, but I didn’t want our cat to go bonkers from the fumes, and I especially didn’t want the house to stink from now until Christmas!
I slathered on the harmless looking goo with enthusiasm, if not optimism. I was unsure that something so innocuous looking and smelling could remove anything more substantive than Easter egg coloring. The directions clearly stated that it could take up to 30 minutes to show some results, and that ended up being pretty close to the truth. Nevertheless, after about a half-hour, the old finish started swimming and mixing with the peach-colored stripper.
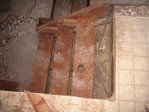
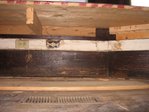
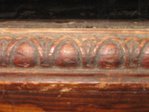
It took a couple of applications of stripper, as some of the varnish had crystallized, like sugar baked on a cake pan. With diligence, what was left of the nasty, old finish was finally gone; and, like a receding wave along the shore, it revealed "artifacts" of wear: An errant hammer strike from a carpenter that originally installed it, a scratch from a furniture move, a gouge or two at the bottom from hard-toed shoes or children vigorously playing with their toys on the dining room floor. But old wood is an amazingly forgiving thing. No matter how brutally it gets treated over a period of time, it only asks of us a little elbow grease to coax it back to its original state.
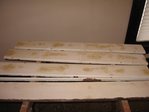
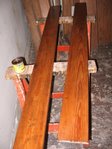
After I removed as much of the old finish as possible, I went back over the surface with that marvelous wash I discovered -- thankfully – early on ("CitriStrip"). This stuff takes it down all the way to the surface of the bare wood. The grain runs clear throughout the boards, each line a sentence from stories of old-growth trees.
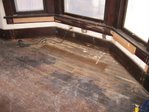
I set aside the next day for staining. The first coat, as I anticipated, went on unevenly. It is the second coat that brings everything together. The irreparable blemishes quietly fade into the background, and the dramatic swirls of grain take center stage.
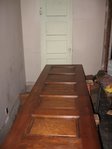
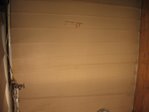
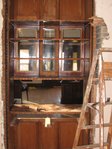
After two coats of polyurethane – this process taking at least two days to complete – it was time to put back together again. Making cabinetry is an art. Putting cabinetry back together is a science! It took the better part of a day; nevertheless, all the doors and hardware finally got put back in place.
In the space between the floor and the bottom shelf, I slipped a note explaining who did what and when to the hutch, just before sealing it up with the board that runs along the front. Now we have a pretty built-in china hutch along with a bit of immortality as well!
No comments:
Post a Comment